Posts mit dem Label stamping werden angezeigt. Alle Posts anzeigen

Mittwoch, 17. Dezember 2014

Practising the art of stamping...

...and still not getting much better. But I have been practising ever since and slowly... I'm getting a little better. I love the possibilities you have with stamping. Not just the images, but all kinds of different techniques, for example making your own decals.

Here's another manicure I have only posted on my Instagram so far.


"Second manicure for the Nail Challenge Collaborative's month of July. We are recreating some of our earliest manicures. I chose a different stamping plate this time. Otherwise not that different. The base is #essie Lapis of Luxury, the stamping plate was Pueen46."

My original post can be found -->here<-- It's even older than the first manicure I recreated.

Montag, 18. November 2013

From the Vault: Nicole by OPI - Dream Catcher stamped

Hi everyone,

here's another oldie, that I had totally forgotten. I remember that I originally wanted to do a comparison between Nicole by OPI Dreamcatcher and a BeYu polish I had just bought. Looking at the pictures I haven't worked on so far, it appears that the BeYu polish never made it onto my nails. Which means... it's still in my growing box of untrieds... (I don't want to count...)

Nicole by OPI Dreamcatcher is a beautiful light shade of pink with golden shimmer. But an incredibly sheer one. These are at least four coats and it was not entirely opaque with those. So I sponged on some gold polish - I forgot which - and then stamped with white Konad polish and PUEEN 47.


I liked this manicure. It was unusually delicate for me back then, so it was kind of refreshing to wear something so sweet/girly. Also, I liked this polish better on me than OPI Pedal Faster Suzi, which is close, but has silver shimmer.

Thanks for reading! :)

Donnerstag, 23. Mai 2013

The Nail Challenge Collaborative - Stamping - Week 3

Another four days without any posts. I can't handle my early shifts well lately. I'm just so tired afterwards that I can't muster the strength to do anything after work. Not even writing a blog post... haha. Maybe I should get my blood tested again... But! Since today was a day off, I'm here to show you another manicure for the Nail Challenge Collaborative.

In letzter Zeit bekommen mir meine Frühschichten irgendwie so gar nicht. Ich bin den ganzen Tag so müde, dass ich mich nach Feierabend zu rein gar nichts mehr aufraffen kann. Nicht mal einen kurz Blogpost zu schreiben. Vielleicht sollte ich meine Blutwerte mal wieder überprüfen lassen... Naja, egal. Heute habe ich frei und darum geht es heute weiter mit einer Maniküre für die Nail Challenge Collaborative! (Wer mitmachen möchte, wir freuen uns immer! Zur Gruppe geht's via Klick auf den Button oben rechts.)


I started with two coats of essie maximillian strasse her, a beautiful mint-ish grey, that just doesn't really seem to belong to a spring collection, but fits so well this year... the year of no spring (apparently). Afterwards, I started deciding what to do with each finger, as I planned to do different stuff to each nail.

Angefangen habe ich mit zwei Schichten essie maximillian strasse her, einem wunderschönen mintigen Grauton. Oder grauem Minzton. Whatever. Ich finde diesen Farbton sehr ungewöhnlich in einer Frühjahrskollektion, aber dieses Jahr passt es ja wie die Faust auf's Auge... Der Frühling lässt ja immer noch sehr bitten. Während ich wartete, dass der Lack trocknet, habe ich mir überlegt, was ich mit den einzelnen Nägeln anstellen wollte.


On my index and pinky, I stamped using white and fauxnad plate m60. I went in with a striper brush and some Flormar 392, a holographic glitter, to make it a little more interesting.

Auf Zeige- und kleinem Finger habe ich mit Weiß und Schablone m60 gestamped und dann einige Linien mit ein wenig Flormar 392 nachgezogen, um das Ganze etwas interessanter zu machen.

For the middle, I taped half of the nail and then stamped using China Glaze Adore and fauxnad plate m65. I originally chose another one, but the image wouldn't transfer properly. After taking of the tape, I applied some silver striping tape instead.

Meinen Mittelfinger habe ich zunächst halb abgeklebt und dann mit China Glaze Adore und Schablone m65 gestamped. Den Übergang habe ich dann mit silbernem Striping Tape überklebt.


On my ringfinger, I did some embellishing using rhinestones and micro beads. I haven't done something like this in ages. It was a lot of fun to do! I took most pictures before topcoating this nail, because I experienced those micro beads melting on me a lot once I applied topcoat. Also, new rhinestones... didn't know if they would turn cloudy.

Meinen Ringfinger habe ich mit Strasssteinchen und Mikroperlen verziert. Da ich so etwas schon lange nicht mehr gemacht habe, war das mal wieder ein netter Zeitvertreib. Die Fotos oben habe ich alle ohne Topcoat auf diesem Nagel gemacht, da es mir zu oft passiert ist, dass diese Mikroperlen sich durch den Topcoat in Wohlgefallen aufgelöst und mir alles versaut haben.

The next morning, sunday, there were a couple of hours of sun before breakfast, so I quickly snapped some more pictures. This time, with topcoat. Man, BTGN Top Sealer bubbled on me like crazy. It's like this often when there's some decoration to cover. No idea why.

Am nächsten Morgen, Sonntag, gab es ein paar Stunden Sonnenlicht, die ich schnell ausgenutzt habe, um noch ein paar Fotos zu machen. Hier jetzt komplett mit Topcoat. Der BTGN Top Sealer hat wieder geblubbert, es war kaum zum Aushalten. Ich habe das in letzter Zeit öfter. Irgendwie mag der Topcoat Unebenheiten (Verzierungen) nicht, glaube ich.


I almost regret that I didn't try it with matte topcoat before taking it off. Might have been interesting! I really like the base though. It's kind of unusual.

What do you think of this?

Here's a lot of other beautiful stamping to see:

Freitag, 17. Mai 2013

The Nail Challenge Collaborative - Stamping - Week 2

Hallihallo~

Today, I'd like to continue showing you the results of my stamping practice. I admit that I didn't really do any nail art this past week. I was just wearing plain polish... at least only stuff from my stash of untrieds. So my second manicure for this month of stamping is about a week old.

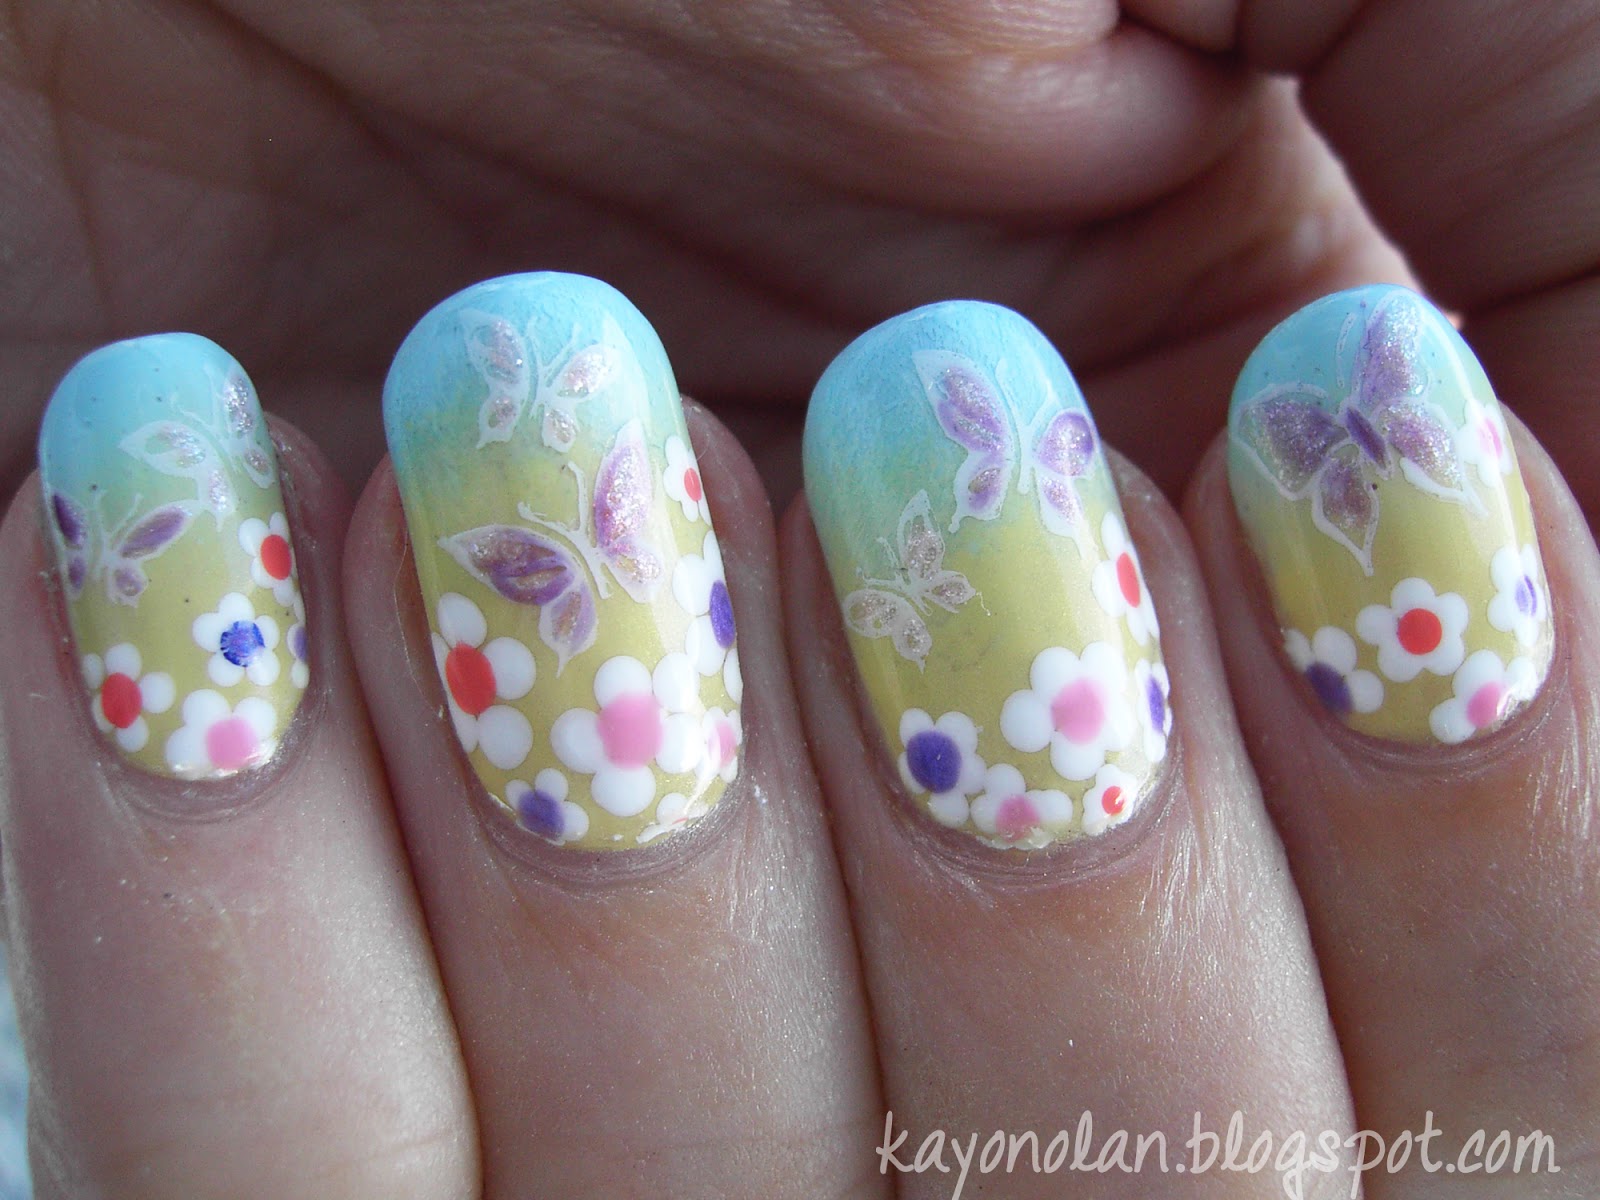
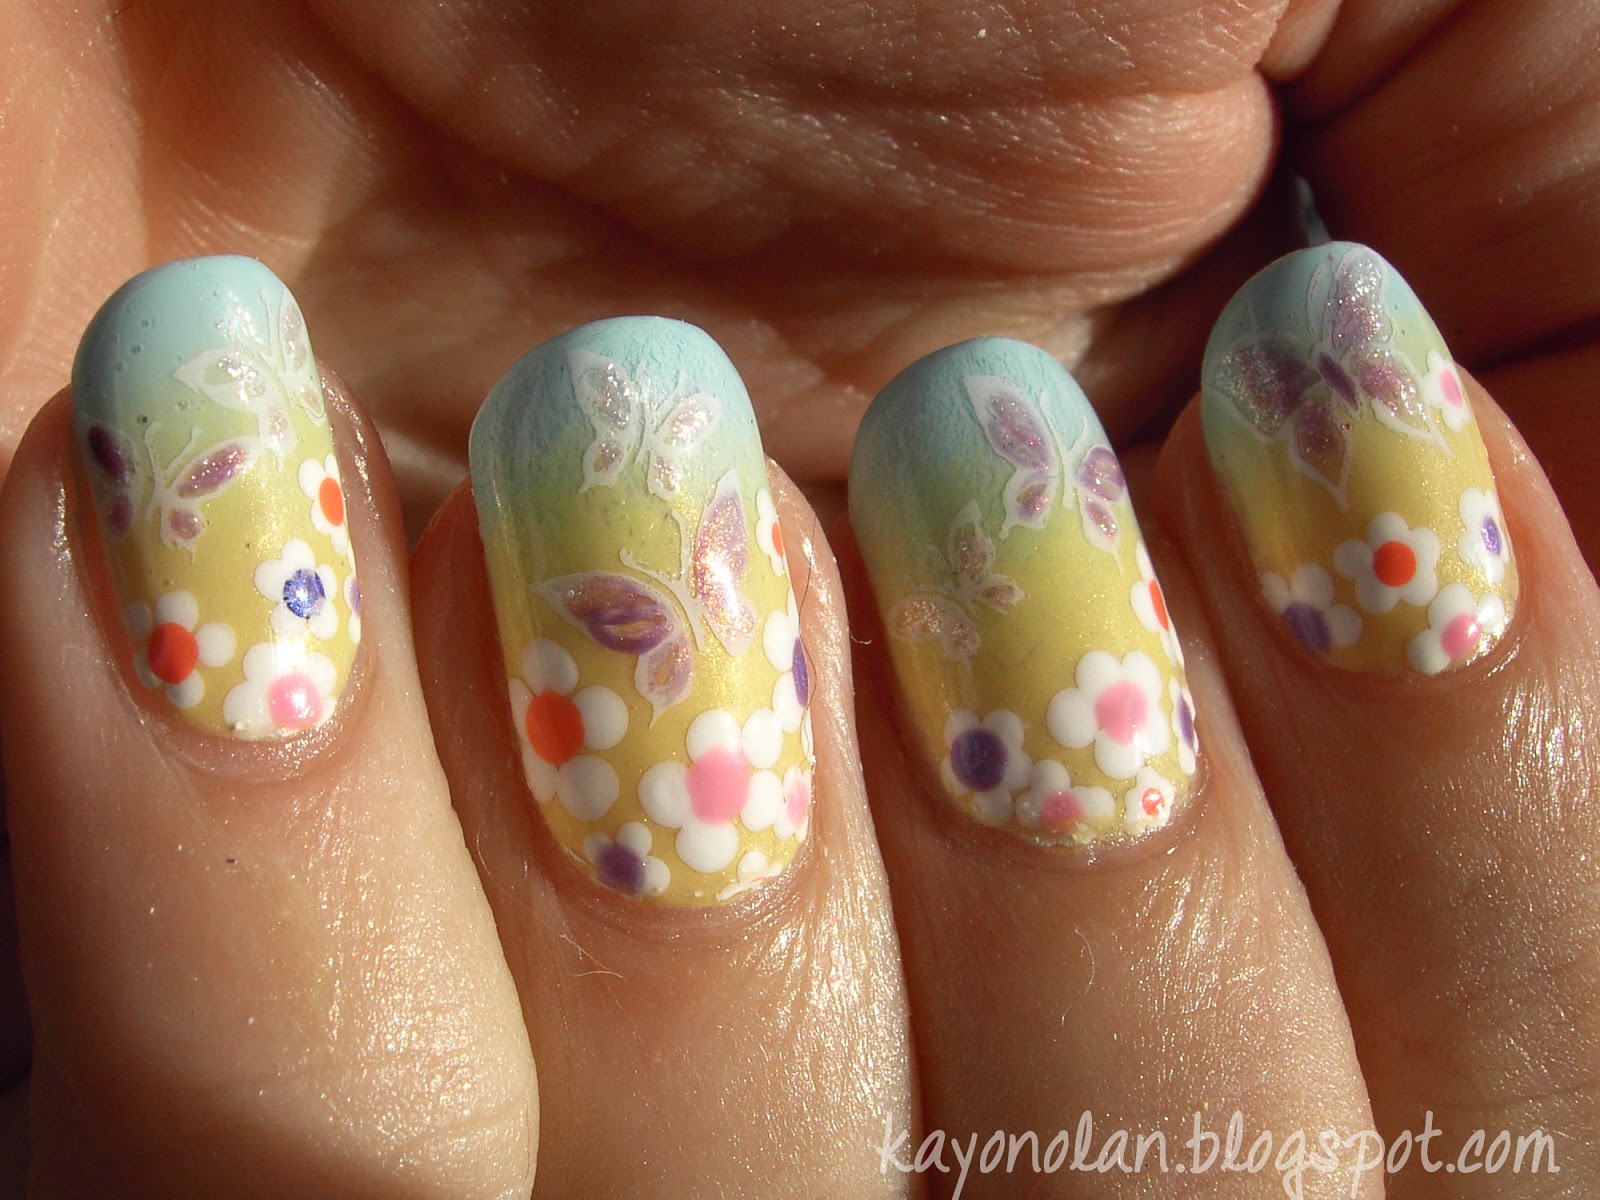
Obviously, this one is not entirely stamped. I didn't fancy any of the big designs I have that day, but the stars and butterfly images on my plates gave me a couple of ideas. I ended up with the butterflies and yet another pastel manicure.


For this mani, I started with sponging my background using essence my yellow fellow and an unnamed Color Club blue. This required a couple of coats, but sponging is kind of fun... I just hate it when I mess up on the third layer.

Für dieses Design habe ich mir zunächst einmal den Hintergrund gesponged. Verwendet habe ich dafür essence my yellow fellow und einen blauen Color Club-Lack, dessen Name mir nicht bekannt ist. Da insbesondere das Gelb nicht so super deckt, brauchte das ganze ein paar Schichten.


Next, I grabbed my dotting tool and created the little flowers near my cuticle area. I actually had to stop myself adding more and more. But I still needed some space for my butterflies. The white is acrylic paint, the colorful dots some random polishes from my untrieds.

Als nächstes habe ich mit Dotting Tool und weißer Acrylfarbe die Blümchen hinzugefügt. Hier musste ich ein bisschen aufpassen, dass ich mir nicht zu viel Fläche mit Blümchen bedeckte. Die bunten Punkte sind Lacke aus meinem nicht kleiner werdenen Haufen unbenutzer Lacke.


Lastly, I stamped the butterflies using plates H19 and fauxnad m78. I used the white stamping polish that came with my original Konad stamping set, but it turned out surprisingly sheer. That gave me the idea to go in with some other sheer colors to make the butterflies stand out a little bit. I used Milani She's so glitzy and H&M Urban Spirit. (It's a coincidence that I just posted a manicure yesterday that used Urban Spirit... I hadn't used it since...)

Zu guter letzt habe ich dann die Schmetterlingsmotive der Schablonen H19 und M78 verwendet und auf den freien Teil gestamped. Trotz Konad Stampinglack waren sie aber irgendwie nicht so intensiv, wie ich mir das vorstellte. Damit sie nicht untergehen, habe ich die Flügel noch ein wenig koloriert.


There's not much else to say about this manicure. It was kind of cute, but I wish I had used white polish for the flowers instead of acrylic paint. The flowers are a little intense... or the butterflies not intense enough. This is also the last manicure on "long" nails. I go impatient again...

What do you think?

Have a great weekend and thanks for reading! :)


Montag, 13. Mai 2013

The Nail Challenge Collaborative - Stamping - Week 1

Hi everyone!

Here's another post for the Nail Challenge Collaborative. I'm starting the posts for the new theme for May: stamping. This month definitely is a challenge for me. I still didn't really get the hang of stamping, but I'll practice my stamping skills this month. So far, 90% of the manicures I wore this month involved some kind of stamping. I decided to try a couple of things and post when I'm fine with the outcome. I got two manicures so far. Today, I'll show you the first.

For this manicure, I used essence Skyscraper as my base. This polish is from my growing stash of untrieds and belongs to the Urban Messages edition from 2011, I think. It's a weird polish, but I like it. I was inspired by the blouse I was wearing that day. At least colorwise.


I used fauxnad plate m64 for this mani. It's a full nail design and honestly, I didn't expect it to stamp so well. I'm still not sure if I just have crappy plates, or if I just managed to transfer it properly for once... To find out, I might buy another set sometime soon.

For the stamp, I used three stamping polishes: green, blue and pink. I applied a couple of drops and mixed them on the plate while scraping off the colors. It worked nicely.


And here are two picture of the base by itself. essence Skyscaper is grey polish with a hint of beige, brown micro particles and a faint blue shimmer. It really does remind me of concrete. Sadly, my camera isn't able to photograph well enough to show the micro particles.


That's it for today! Thanks for reading! :)


Freitag, 19. April 2013

The Nail Challenge Collaborative - Pastels - Week 1: p2 adorable

Hi there~

last week I was out with my sister and mother for some shopping. We also came across a dm store I don't usually frequent and there I found the one p2 sand polish that has always been sold out in the stores I usually go to: p2 adorable. It's the baby pink one and apparently the most sought after. Well, they're just refilling the display, so I obviously grabbed one.

I really like this color. I wasn't sure about it at first, because the color is so light and my skintone is kind of yellowish, but I really fell in love with this one. At first, I wanted to wear it for one day only, but in the end, I decided to turn it into my first mani for the April theme of The Nail Challenge Collaborative (the group that came up with the four seasonal challenges I have been participating in).


This is three coats of p2 adorable, but two would have been enough. I just broke my index nail while wearing it that first day and decided to add one more layer after filing down. Yes, I was lazy. I stamped the plum flowers with black polish and did not seal it with topcoat. The black started to wear off a lot on my right hand... but topcoat would have ruined it.

And this is why:

top coat on ring finger nail

no top coat

My pictures didn't capture reality well enough... but this polish turns into a weird kind of pink once you add topcoat. I really didn't like the color. It's also loosing its blingy character. It just turns boring. I tried two other sand style polishes by p2 and I liked them better with topcoat, but this one... nah, best to leave it as it is. I also tried with matte topcoat - no good either.

So, that's my kind of boring first pastel mani. But did I mention that I like this polish..? <3

Thanks for reading!

Donnerstag, 13. Dezember 2012

Catrice - Lavender Breeze stamped

Today, I'd like to show you an oldie... even though it's not the oldest from my picture stash. It's the first manicure I did after breaking my pinky nail. I wanted to divert the attention from my pinky and thought that light polishes would do the job.

I decided on Catrice Lavender Breeze which was part of some LE back in 2010, I think. It was from before the time Catrice became available to me. It goes on rather smoothly concidering it's a purple tinted white polish. (I think the name actually fits the polish!) I used two coats for this manicure.


For the stamp, I used essie Nothing Else Metals from the mirror metallics. I originally wanted to use a playful floral stamp, but after the first nail (my pinky), I couldn't get the image to stamp again. I gave up after about 20 tries. That's when I switched to another image, that stamped perfectly.


Despite the stamping problems, I really like the outcome. I wish I had had more time at hand back then, so I could have redone the pinky nail, but because of a dinner party, I had to leave it like that.

Do you think I diverted enough from my broken pinky nail?

Mittwoch, 7. November 2012

Fall into Autumn 10: Favorite Sweater

Today I want to continue with the Fall into Autumn challenge. I'm a little bit behind the schedule, but I'm going to catch up this week! Next on the schedule is a manicure inspired by my favorite sweater. I loved the idea when I read the schedule for the first time. But it proved to be a little difficult for me. My favorite sweaters are either single-colored or kind of christmas-y... snowflakes and stuff. And even though we had the first snow already, I still refuse to do snow manicures at this point!

But then I decided to base this manicure on a sweater that used to be my favorite sweater before my current favorites entered my wardrobe. It's a classic brown with a white and orange argyle pattern on one side of the front. I thought about painting the argyle pattern the way I did a manicure last year... but that ended up kind of wonky. Since my stamping worked okay for the last Fall into Autumn manicure, I decided to try again - especially because I own a plate with an argyle pattern!


The stamping is not the best and you can definitely see some progress when you compare the nails. I started with my pinky and finished with my thumb.

As my base color, I chose one of the first polishes I bought. I don't even remember why I needed a brown back then... it's not even a color I wear much. Not even now. Anyway, it's from the discontinued essence multi dimension line and is called Spicy. It seemed to be the closest to the color of my sweater. Spicy is a brown shimmer that tends to be a little bit streaky. Careful application solves that problem though.


On top of essence Spicy, I stamped the argyle pattern from fauxnad plate m60 with a white stamping polish. Afterwards, I picked a small nail art brush and some drops of p2 notice me! to fill in the argyle pattern. p2 notice me! really is my favorite orange creme! I filled in some white lines too, because the stamping was inconsistent, but overall, it looked quite nice. Looking at the pictures now... well, it enhances everything and it doesn't look as nice anymore ^^; Yeah, I'm picky... I finished the whole thing with a generous coat of essence BTGN Top Sealer and tried not to smudge it.

Wearing one of my current favorites. I love the white poofy things.

What do you think of my newest venture into stamping? The sweater I chose is nothing special. A nice staple and I still wouldn't want to miss it. Which is my problem. I actually have no idea where I put the sweater...

Dienstag, 28. August 2012

From the Vault: Neon Stars

Okay, there's only one post left for the Lazy Days of Summer Challenge, but I absolutely didn't feel like working on the pictures today... I have to admit, I was a little distracted by printed media these days. I finally got the Hunger Games trilogy with my Dshini points last week (that's what the banner in my sidebar is for, btw). While it took me about a week to read the first volume, I ended up reading the other two in a single day and thus, I'm lacking a tiny bit of sleep.

But you know, there are still a couple totally challenge unrelated manis waiting to be posted, so I want to show you one of those. I feel a bit bad about keeping them in my blog folder for so long... I finally worked on those pictures on July 1st...

So here's what I did with my then new set of Color Club neons.


I don't even remember what my base for this mani was. No idea... I felt a little bit like stamping that day and pulled out all my star themed plates. I love stars... I used to be really obsessed with the shape and all. (Now I'm obsessed with snowflakes.... aaah, can't wait for winter to come xD)


I just stamped all kinds of stars on my nails using plain white stamping polish, let that dry and then repainted the stars with my new neon polishes. I remember the dark green being a Flormar polish, the only "outsider". No idea why I stamped the sun. It seems a little random, don't you think?


I think it turned out okay for a first attempt at repainting stamped images. Still, I'm avoiding stamping... it's a bit scary and I'm really envious of all the awesome ladies to be able to create those beautiful stamping manicures. I really am.


So what's your opinion on my little star themed manicure?

Samstag, 7. Januar 2012

Holo plus snowflakes

This manicure, or at least the process of creating it, inspired me to go looking for a better silver nail polish. I already posted about the result of my shopping, but I still wanted to post about this mani anyway. It's not too bad, but I had something else in mind originally.


 I originally wanted to stamp those snow flakes on a silver metallic polish and I chose this silver polish by [b]asic, but it turned out to be one streaky mess. Hence, I decided to cover it up using Milani HD. I really like HD. I think I might like scattered holos better than linear ones... but I don't own too many linear holos yet!


Anyway, I stamped the snowflakes using p2 scandal. I messed up one finger - the image didn't transfer properly. To fill in some spots, I added some dots.

Here's what I used:


I might try this again using my new silver polish. It looks nice with the holo, but due to the holo effect the snow flakes are somewhat unimpressive. I want them to be the star of the mani though.

Hm, my next mani will be snow flakes too. I really love them. Sadly, we only had snow once this season yet. And only for about 3 days too. I want more snooooow! :D

Sonntag, 27. November 2011

Nail (Art) Collage

Hm, this is the first time I'm doing a collage of different nail designs I have been wearing at some point. I did this, because I feel that most of these are not nice enough that I want to write a whole post for them... some, I just didn't have pictures that I would want to post. So here are six manis I have been wearing in the last ~6 weeks that didn't pass my "single blog post requirements", haha.


  • The two in the top row are basically the same mani. I just added one of the new p2 crackles (red volcano) on top. because I thought it would look nice together. It did, but when I edited the pictures, I just didn't dig the crackle anymore. I still wish they would make red volcano a regular non-crackle polish. The brown is a very beautiful shade though.
  • Next is a tape mani. It was a lot of work (for me) but somehow... I didn't like the result.
  • Followed by a stamped mani. This is China Glaze GR8 with a stamped bamboo pattern. Somehow, it looked weird. Like some failed crackle mani.
  • Next is essence Gold Old Buffy from the Vampire Love LE. I love this polish, but my pictures were all weird. I will wear this again soon enough. I will try to take better pictures.
  • I really wanted to do this violett-to-silver gradient. But the polishes I chose wouldn't blend properly. Also, for the first time I experienced extensive top coat shrinkage which ruined my pictures. It wasn't noticeable from a normal distance though. I only noticed on the pictures.
What do you think? Would you have posted even one of those in a single post?

Also, I'm looking for a nice rather dark blueish violett creme polish. Suggestions?

Montag, 31. Oktober 2011

Halloween-Mani #2 - playing around with Zombie Zest

Okay, another late Halloween-Mani. I won China Glaze Zombie Zest in a giveaway this summer and had been waiting for fall/halloween so it would finally be an appropriate color. This is my very first China Glaze polish and I love the color!

I was a bit surprised though how sheer it was. And since it is my first China Glaze I was a bit greedy and decided that I need to layer Zombie Zest to preserve it ^^; I swatched it over every green and brown polish I own and finally decided to layer it over a metallic green polish from the drugstore brand basic. This is my second time wearing this green.


This is the basic polish on its own. It doesn't have a name or a number like most of basic's polishes. Annoying. It's a dark green metallic polish with slightly blue hue. It looks bluer in the picture than it really is. It's pretty streaky, but since I wanted to layer anyway, it didn't bother me much.

Two thin coats of Zombie Zest on top and it looks completely different. I needed two coats because the pretty glitter didn't spread completely evenly... which I didn't like.


The last picture was taken in daylight on a cloudy day. The pictures don't do the polish justice though. It seemed to have an inner glow somehow. Soooo pretty! I was staring at my nails a lot and because I liked it so much on its own, I didn't even add nailart until the very last day.

On the last day of wear, I was going through my nailart stuff and found out that I had a halloween themed stamping plate all along. Duh. I completely forgot about it. So right before taking this pretty green off my nails, I decided to play with the plate.


Hm. I even used my special white stamping polish by Konad, but on most nails the image didn't transfer well. A lot of the polish would still be on the stamper too, even if the image transfered properly. Maybe the plate's engraving is a little bit to "deep"? No idea. The spider from the same plate didn't transfer at all. In the end, I quickly painted some with the stamping polish and added some red rhinestones for contrast.


I wore this for like half a day. I still like Zombie Zest a lot better on its own, but I got to play around with a forgotten stamping plate, so it's okay. One thing I noticed again while looking through my photos of this mani... my camera really doesn't like greens. It failed before and this time once again! If my other camera weren't so bitchy with her batteries, I would use it more... :(

How do you like my Zombie Zest-layering? I yet have to wear Zombie Zest on its own... buuuut, so greeeeedy... can't waist it!!! ^^;

Mittwoch, 3. August 2011

Under the sea

Lately I'm really in love with green and teal shades. Basically, I'm in love with them since I won Sarah's giveaway that contained two awesome shades by models own. Looking at them I had this idea of an aquatic design. It took me a while to get around doing it, but I was really satisfied when I finally finished it. Especially because it was the first time in a few weeks that I actually did some nail art.


I have this habit of painting my nails so it looks right for me... but it always turns out to be hard to photograph in the end. So, I rotated this picture...

I used both the teal shades I got from Sarah, as well as every single teal and green shade I own. I first painted my nails with the darker of the two models own polishes (Slate Green) and then sponged the other colors on. That was the point when I first realized that the design I had in mind couldn't be done with the polishes I have. The difference of the shades is just not big enough to really pop. I imagined a nice sponged background and then stamp it with the metallic blue, green and silver shades I have. Like layering them. But well, won't do. So I decided on doing what I could and make it pop using glitter. Luckily, I had some blue and silver glitter sitting around as well as the holo polishes from Tera, that I also used in the end.


It doesn't look like what I wanted to do, but I still loved it. It was all sparkly, shiny and glossy. I'm satisfied with it because the colors are harmonizing. It was also very fun to do.

One thing I noticed: I barely had any tip wear even after one week of having this design on my nails. It could either be that models own polishes and my nails get along. On the other hand, I'm currently trying to get my nails in a more or less square shape. So maybe the new shape doesn't cause me so much tip wear while working. Please ignore my index finger nail though... couldn't get it into square shape that day :D

I wish there was some sun... those are all indoor pictures and none of them really show how pretty it was. :S
Related Posts Plugin for WordPress, Blogger...