Posts mit dem Label Flormar werden angezeigt. Alle Posts anzeigen

Sonntag, 21. Juli 2013

The Nail Challenge Collaborative - Flowers - Week 2 - Mosaic

Good morning everyone!

I wanted to show you this manicure way earlier, but a lot of things happened this week and I never got around to do it. My father was finally hospitalized this week to have his cancer surgery, only to be told a couple of hours before the actual surgery that it has been cancelled due to unforeseen emergency surgeries. It's supposed to happen next Wednesday now. Thus, not sure how the next week will go for me. I tend to be rather pessimistic... and having the late shift next week doesn't help. I can't really go see my dad because of visiting hours being identical to my shift. >_<
But for the time being... on to the manicure!

Diese Mani wollte ich eigentlich viel früher zeigen, aber in dieser Woche sind so viele Dinge passiert, dass ich einfach nicht dazu gekommen bin. Mein Vater kam für seine Krebs-OP diese Woche ins Krankenhaus. Allerdings wurde die OP nur wenige Stunden davor letztlich abgesagt, weil die Intensivstation mit ungeplanten Notfällen belegt war. Der neue Termin soll nun der Mittwoch sein. Keine Ahnung, wie diese kommende Woche für mich laufen wird. Ich tendiere da so zum Pessimismus... und die Spätschicht zu haben hilft da nicht gerade. Besuchen kann ich meinen Vater dann auch nicht wirklich, weil meine Arbeitszeiten sich mit den Besuchszeiten im Krankenhaus decken.
Aber für's erste mal weiter mit der Mani!


Ombre flowers. I got the idea from a tape manicure I have seen on Pinterest. I never really planned this, but since I had the idea for so long, the process had somehow already been decided before even starting. I'm not a hundred percent satisfied (because I messed it up a little with clean-up), but I liked it. I'll skip the how-to explanations this time, because I took pictures while painting my thumb and decided to include them.

Ombre-Blümchen. Die Idee kam mir nachdem ich eine Tape-Mani auf Pinterest gesehen hatte. Wirklich geplant habe ich die Blümchen nie, aber da ich die Idee so lange im Kopf hin und her gewälzt hatte, stand schon vor dem Loslegen irgendwie fest, wie ich die Idee umsetzen würde. So ganz zufrieden bin ich nicht, da ich die Mani beim Clean-Up leider mal wieder ein bisschen versaut habe, aber ich mochte sie gern. Das Wie schenke ich mir diesmal, da ich vom Entstehungsprozess der Daumenbemalung Fotos gemacht habe und diese weiter unten einfach mal einfüge.


Products I used for this mani include:
Für diese Mani habe ich unter anderem benutzt:

- Flormar M01
- light pink Color Club, unnamed
- Manhattan Sashimi Mimi
- pink Color Club, unnamed
- Kiko Apple Blossom
- Catrice Welcome to Roosywood
- Kosmetik Kosmo Binoticum
- white acrylic paint

I used those colors plus mixtures of the polishes, like light pink+Sashimi Mimi or Apple Blossom+Welcome to Roosywood, to make the ombre softer. Actually rather easy, but it looks nice, ne? If I did these again, I would do the outer lining with white polish though. I think, I wouldn't have messed it up while doing clean-up if it had been white polish. (But acrylics are so much easier to work with...)

Alle diese Farben plus deren Mischungen habe ich verwendet, damit der Ombre-Effekt möglichst weich aussieht. Eigentlich auch wieder ziemlich simpel, aber es hat irgendwie was. Sollte ich dieses Design noch mal machen - die Chancen stehen gar nicht mal schlecht - dann würde ich die äußere Umrandung aber in weißem Lack machen. Ich bilde mir ein, dass ich es beim Clean-Up nicht so versaut hätte, wenn es welcher gewesen wäre. (Nur leider arbeitet es sich mit Acrylfarbe so viel einfacher...)

Lastly my micro-tutorial on the process. I omited the final picture with topcoat... but I think, you get the idea.

Zum Schluss noch mein Mini-Tutorial zum Entstehungsprozess. Das letzte Bild mit Topcoat fehlt, aber ich denke man kann verstehen worum es geht.


Thanks for reading!


Donnerstag, 4. Juli 2013

The Nail Challenge Collaborative - Neon - Omake

Hello!

As mentioned in yesterday's post, I'm going to do another Omake post. Obviously about the somewhat fails of my neon challenge. There are four more manicures I took pictures of that didn't make it for different reasons...


For this one, I tried my fanbrush for the first time. On a base of flormar matte M09, I first added some white acrylic paint and then some black. It wasn't uniform enough for my taste, but I kind of like it. The color combination is one I really like.

Für diese Mani habe ich den Fächerpinsel zum ersten Mal benutzt. Auf flormar M09 habe ich mit dem Pinsel erst weiße und dann schwarze Acrylfarbe aufgepinselt. Ich mag die Farben zusammen, aber meine Fächerkünster waren mir zu unregelmäßig.


Here, I tried to do a neon glitter sandwich. The Woo neons are all quite sheer, especially the green and yellow ones, which made me think of a sandwich. In the end, I chose a bright green no-name Color Club as my base, added essence edward (from the nail art twins) and topped it with one coat of the yellow Woo neon. It was okay, but turned out to be too green for my taste. ^^;

Hier habe ich mich an einem Neon-Glitter-Sandwich probiert. Die Woo-Neons sind ja recht sheer, besonders der gelbe und der grüne. Ich habe mich dann für deinen namenlosen grünen Color Club-Lack entschieden, darauf essence edward aufgetragen und darüber wiederum eine Schicht des gelben Woo Neons. War nicht übel, mir aber irgendwie zu grün.


For this one, I tried to do classic neon tips... while imitating the colors of a pair of shoes I was pondering to buy back then. (I didn't buy them...) I like the colors together, but the nude polish doesn't match with my skintone. Boo.

Hier habe ich klassische Neon-Tips machen wollen... und hatte dabei die Farben eines Paar Schuhe vor Augen, die ich letztlich nicht gekauft habe. Ich mag die Farben zusammen, aber leider passt der Nudelack nicht zu meiner Hautfarbe.


And here I tried the sugarspun technique for the first time. Same green polish as above on a coat of white. I don't think I'm patient enough for a manicure like this. It turned out to be too thick, uneven, weird. And too green. If it just were a grass green neon...

Hierfür habe ich mich zum ersten Mal an der Sugarspun-Technik probiert. Basis war wieder der selbe grüne Lack. Ich denke, ich bin nicht geduldig genug für diese Technik. Mir war's am Ende zu dick, zu ungleichmäßig und überhaupt. Und außerdem war's mir zu grün. Ein grasgrüner Neon wäre besser gewesen.

That's it... Neon manicures in the past. I'll continue to play with them, though.
Das war's auch schon. Neon-Manis rücken nun in die Vergangenheit. Aber ich werde weiter mit Neons spielen.... :P

Thanks for reading!

Montag, 29. April 2013

Asian Dragon

I went a little crazy painting my nails this weekend. But it was fun. ^^
I wanted to paint an asian dragon over all my nails. That seemed okay, but while I was painting I realized, that right now my nails are either too small for this kind of painting, or I simply drew too big. Maybe a little of both.


For my dragon manicure, I mainly used
- A-England Dragon (noooo, not the reason I drew a dragon at all...) body
- Kiko 395 body
- Flormar SuperShine 07 body outline
- Priti NYC Queen Victoria back
- China Glaze Riveting details on the back
- OPI My vampire is buff background

Since I really battled with my hand while trying to take pictures, I decided to take seperate pictures as well and just put them together... My hand is not flexible enough. ;( Wow! to all those ladies who can bend their hand to take proper pictures like that...


just the dragons body...

in cloudy daylight

I actually used polishes only (ok, except for the dragon's teeth)! I really like how the scales turned out. I ended up doing them differently from my plan, but it works. I just wish my nails were longer. I would have loved to paint more than one foot... and more~ tail.

So, what do you think of my excessive painting? Do you agree that a bit more space to paint on might have been good?

I'm going to upload my dragon to Kayla's indie polish contest. There are some really nice manis uploaded my close to 40 other nail artists. ^^

Ok, thanks for reading~ Tomorrow, I'll continue with my pastels.

Sonntag, 31. März 2013

Let it Snow! Challenge 7: Fireside Glow

Hi again!

I feel like I'm spamming, but I really want to post my Winter manis, haha... I'm continuing with theme 7, fireside glow. The fireside at my house is probably going to keep glowing for at least another month, but it already has a completely different feeling to it than in January. Which is interesting, because it's actually colder now than back then.


Another gradient. I love gradients. I used orange, red and burgundy polishes for this one, but I can only name three of them. One of the Flormar duochrome, Zoya Rica and p2 celebrating red. I still like this mani a lot. On the tips I used alessandro Black Dots, which has a similar effect as OPI Black Spotted. I think it does look a bit like charcoal.

Once again, thanks for reading!


Dienstag, 9. Oktober 2012

From the Vault: Dragon!

One challenge done, the next post for the other not quite due yet... and loooots of old manicures sitting in the photo folder. So it appears to be obvious to work on getting those manis out~

This spring, I won the 300 follower giveaway over at Charlottes-Nails. The prize was an a-england polish of my choice and after going through a lot of swatches online, I decided on Dragon - my first a-england polish! It's a gorgeous green polish with a light holographic effect and copper shimmer. Just like what I imagine dragon scales to look like. So when it arrived at my house (shipping was really fast!), I immediately had to put it on my nails... which have been extremly short back then. It must have been very shortly after my major nail breakage.

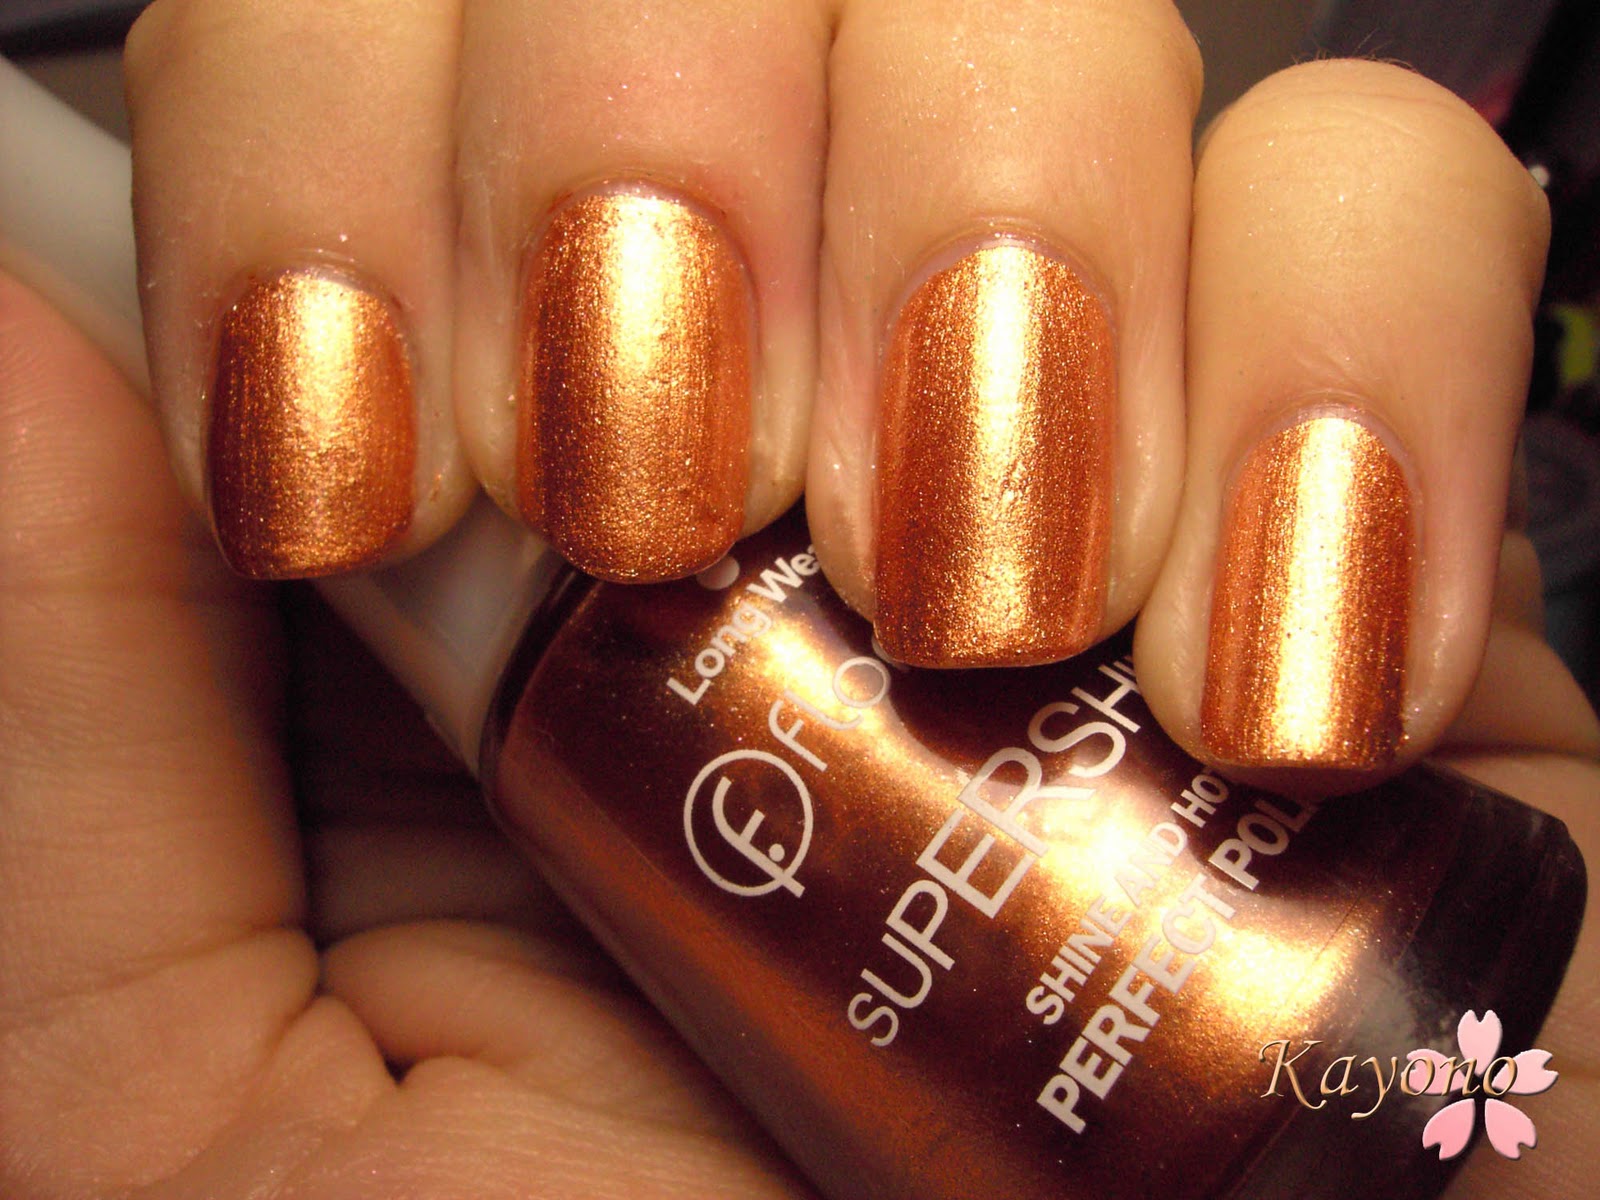
I wore a-england Dragon solo for a day and got a lot of comments at work. People recognized the beauty without knowing that it is a special polish indeed. I forgot to take pictures that afternoon though. But because my nails were so short, I somehow ended up with crazy tip wear when I got home from work the next day. Some simple nail art had to cover up that fact, so I turned it into a framed mani. For the frame, I used Flormar SuperShine 07, a pretty copper shade that is very opaque. I decided on this shade, because it seemed to pick up the underlying copper shimmer in Dragon. The copper shimmer is barely visible in my pictures, but it's there.


Have you tried a-england polishes? What do you think of this particular shade?

Thanks again to Charlotte for hosting this giveaway and thus, giving me the chance to win this beauty. I'm very happy with it~

Dienstag, 28. August 2012

From the Vault: Neon Stars

Okay, there's only one post left for the Lazy Days of Summer Challenge, but I absolutely didn't feel like working on the pictures today... I have to admit, I was a little distracted by printed media these days. I finally got the Hunger Games trilogy with my Dshini points last week (that's what the banner in my sidebar is for, btw). While it took me about a week to read the first volume, I ended up reading the other two in a single day and thus, I'm lacking a tiny bit of sleep.

But you know, there are still a couple totally challenge unrelated manis waiting to be posted, so I want to show you one of those. I feel a bit bad about keeping them in my blog folder for so long... I finally worked on those pictures on July 1st...

So here's what I did with my then new set of Color Club neons.


I don't even remember what my base for this mani was. No idea... I felt a little bit like stamping that day and pulled out all my star themed plates. I love stars... I used to be really obsessed with the shape and all. (Now I'm obsessed with snowflakes.... aaah, can't wait for winter to come xD)


I just stamped all kinds of stars on my nails using plain white stamping polish, let that dry and then repainted the stars with my new neon polishes. I remember the dark green being a Flormar polish, the only "outsider". No idea why I stamped the sun. It seems a little random, don't you think?


I think it turned out okay for a first attempt at repainting stamped images. Still, I'm avoiding stamping... it's a bit scary and I'm really envious of all the awesome ladies to be able to create those beautiful stamping manicures. I really am.


So what's your opinion on my little star themed manicure?

Samstag, 17. März 2012

Flormar 50

Well, I seldom post about the color I'm wearing on the same day, but it's happening today. I'm just so in love with this shade, I have to show you right away! I'm talking about Flormar 50 from the Supershine line. I have no idea why I never noticed this polish in the stores before. I just got it with my latest order from Douglas and basically only got it, because I needed a few more  items to use a coupon. So glad I ordered it!


Flormar 50 is a green polish leaning a bit teal. Looking from some angles it even borders to a neon. It's really bright for sure. What I'm not exactly sure about is the finish. It looks like a shimmer and somewhat metallic at the same time, but it none of those. Frost maybe?


On my pictures, I'm wearing one (!) coat of Flormar 50 and no top coat. I like the finish without top coat as it would probably be too bright for my tastes if I applied top coat. Maybe I'll mattify it tomorrow...


I'm pretty sure this polish works great for stamping too. I'll have to try soon. Drying time was average, I think. It bubbled a little bit on me, but  I have to admit that I might have been a bit quick with my base here. Clean up was a little bit difficult... I'll see when I take it off, but I have a feeling that it might have stained. It stained my cuticles, but those are a different story anyway.


Did I mention that I love this color!?

Donnerstag, 26. Januar 2012

Layering Flormar 07 and Misslyn "Queen of Hearts"

Today I have a layering experiment to show you. I'm not pleased with how the pictures turned out, but I love the result of my layering nonetheless. I only used two polishes, but I think they really compliment each other.

First is Flormar #07 from the Supershine line. It's a really beautiful coppery polish I had recently seen on another blog. I decided that I needed this too. It's quite opaque with just one coat, so maybe it works for stamping. I'll have to try that. #07 is not very streaky even though it's a metallic and it dried quite fast.


The polish I used to layer over Flormar #07 is actually my first Misslyn polish. Misslyn has been a name I recognized last year, when they returned to the drugstores. I think I bought a few things from them when I was a teenager. Misslyn was then only available in bigger department stores and not the cheapest. Last year they revised their product range and returned with a modernized display. I think bigger drugstores also feature this brand now. They have a nice nail polish range and feature a new LE every two month or so. But they are still a bit pricey.

Anyway, the polish I used for layering is from their current LE (Glam up your life) and is called Queen of Hearts. It looks very pretty in the bottle, so I gave in and bought myself a bottle. Misslyn polishes contain 10ml and cost 4,95€. Here's a quick swatch of the polish by itself.


This is two coats. I don't think it's meant to be worn alone. It is reeeeaaally sheer. I don't really know how to describe this color... Rosegold maybe? It's kind of golden and flashes pink as you can see on the swatch. Well, I had this idea that it would probably look great over Flormar #07, so I tried.

direct sunlight

indirect sunlight
Wow, this one was hard to photograph! The effect is actually pretty strong on the nail, but I couldn't capture it. Especially in sunlight, it just looked like Flormar #07 on its own. The picture in indirect sunlight gets close, but it is lacking the "glow".

Well, I decided that I would directly compare them. So I did some swatches on artificial nail tips.

Flormar - layered - Misslyn

The first is artificial light, the latter shows the rest of what used to be direct sunlight. I think it's more apparent now. I really do think those two shades compliment each other. Flormar #07 is pretty on it's own, but it's a nice choice of "underwear" for Misslyn Queen of Hearts. On its own, the Misslyn polish is sheer and somewhat pale? But it really starts to glow when layered over the beautiful copper.


I loved this manicure. <3 So glad I bought the polish. Now I'm still pondering whether to buy the other duochrome from this LE called Royal Desire. The swatches I have seen looked promising...

What do you think of my layering experiment? Do you own any Misslyn polishes and what do you think of them?

Mittwoch, 9. November 2011

Cupcake-Nails - mein Beitrag für das Gewinnspiel bei mel et fel

Wow, I really loved doing this manicure! It was sooo much fun! :D

I did this manicure as a birthday present to Karmesin's daughter Lisa, who's turning 1 year old today. Karmesin from mel et fel is currently celebrating her daughter's birthday as well as her first 100 followers. She's having a cute little giveaway and part of it is a little contest. I just had to enter, because I immediately knew, that this was *the* chance to finally do Cupcake nails, hehe. I wanted to do some for a while, but there was no birthday around... :D If anyone from Germany, Austria or Switzerland still wants to participate, click "giveaway". The giveaway is still open for another 2 days.

So here is the result: Happy Birthday, Lisa!


I used a lot of essence polishes as base colors: 01 a hint of mint, 03 my yellow fellow, 05 forget-me-not from the Blossoms etc LE, Fall for me from the multi dimension line. And Essie French Affair, my current favorite pink polish. The cupcakes itself were painted using acrylic paint. It just dries faster. I filled the little hearts with some holo polish, Flormar 392. Top Coat is my beloved essence BTGN Top Sealer.


I think, for a first try, my cupcakes turned out okay. I really regret using the essence Express Dry Drops though. The polishes dried faster, but they also bubbled and the bubbles are even showing in the acrylic paint. :( That kind of destroyed it for me. But I still liked it. It's just so colorful! :)

What do you think? Anybody owns these Express Dry Drops and wants to share their experience?

Sonntag, 16. Oktober 2011

Fail: Silver polish stamped... and shattered...

Okay, I consider this mani a huge fail. It didn't turn out right at all. I had this idea, but it just didn't turn out the way I wanted. Meh.

I have these metallic polishes by drugstore brand "basic". They are very cheap and actually aren't too bad. I chose the silver one. My idea was to try essence - Style me love for stamping and I thought that silver would make a nice base for that. Style me love actually works for stamping, but the stamping design I chose is too weak for a silver background. I'll try again some other time.


I didn't like the result enough, so I added one coat of Flormar 392 to give it something extra. Well, failed. I didn't like it better at all. But I still like 392 a lot.


After wearing this for 2 days, I felt like I had to add something else. I had seen several blogposts painting crackle polishes diagonally, so I tried that.


I think it looks a lot more cracked that way than when you paint it straight. I like that. But I still didn't like the manicure... ^^;

Well, there have to be fails to appreciate a nice mani. ^^;

Mittwoch, 31. August 2011

Zoya - Tanzy... plus holo

Weather continued to be bad... so after finally taking off my starry night sky, I chose one of the polishes my friend brought me from her trip to the US. It's Zoya - Tanzy, a bright orange shade. I loved the swatches I have seen on other blogs. I just had to have my friend bring it.


No sunlight... the picture is kind of dull... and it's the best out of those I took. I'm not exactly sure if I like it on my nails, even though I adore the color.

Later, the sun actually showed itself. I took the chance to take some more pictures. Please excuse the tip wear...

I probably wore this for about 5 days. I would have taken it off after 3 days at most, if I hadn't been in a slump since a few weeks ago. But at least I got the chance to spice it up a bit in my opinion. While checking my local drugstores for a polish a fellow blogger from New Zealand was looking for, I also walked into my local Douglas store to see if they had some more OPI on sale: No luck. But I found another polish I had been looking for. It's Flormar - 392, the one I mentioned in my Essence - Holo post.

Flormar 392 has much finer holo particles and applies really well! I put one coat of it on my Tanzy mani just to see the effect... and loved it so much on Tanzy that I did my other 9 nails as well. I like it much better this way! Sparclelicious~
.
Related Posts Plugin for WordPress, Blogger...